
Can I Install Smart Film Tint for Car Alone?
2022-04-28
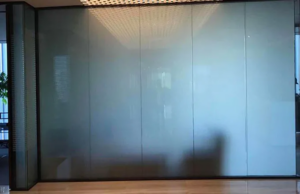
What should be considered before assembly?

Before assembly, one thing in particular must be observed – cleanliness! Before you start installing your smart film tint for car, you should thoroughly clean your glass surfaces using a scraper and some glass cleaner.
This prevents the inclusion of dust and dirt and at the same time ensures a better hold of the sun protection film.
When installing outer foils, you should make sure that you do this on a day with as little wind as possible in good weather. This makes assembly much easier and reduces the risk of inclusions.
You should also make sure that you really measure the glass surfaces correctly. The glass surfaces extend a few mm into the frame, which must also be taken into account.
What steps should I follow when installing smart film tint for car?
First of all, you should measure the panes on which you want to stick sun protection films to make sure that you are ordering the right cuts or the right number of linear meters.
If you then want to mount your sun protection film, you first remove (if available) the glazing beads or the rubber seal in order to later ensure the edge connection of the film. A screwdriver is a useful tool for this.
During the installation itself, the first step – as mentioned above – is to thoroughly clean the entire glass surface. You have stubborn dirt on your glasses. We recommend cleaning the window glass with a glass scraper.
Hold your blank to check whether smart film tint for car really fits
If everything fits, spray the glass surface thoroughly with a mixture of water and assembly concentrate (60:1). The pane can be really wet, because you will later squeeze the water out with a squeezer under the film and it will make it easier for you to install the sun protection film.
Then carefully remove the protective film from the back of the film without touching the adhesive. It is helpful if you also spray your fingers with the mixture of water and assembly concentrate to avoid fingerprints on the sun protection film.
Moisten the adhesive surface of the foil with the assembly concentrate
A little tip: Only remove the smart film tint for car at the top and attach the upper part to the glass surface and then go down step by step.
When the sun protection film covers the entire surface, use the squeezer to squeeze out the excess water under the film with a little pressure. For the edge area, use the squeegee to get into every corner.
It’s best to start in the middle and squeeze from their first up and then down. It is important to always squeeze from top to bottom or from bottom to top, never from right to left. This is how you avoid streaks.
If you can no longer see any bubbles or water deposits behind your sun protection smart film tint for car. You can carefully dry the edge with a clean cloth.
Finally, ensure that the film is attached to the edge of the window frame by either reinstalling the glazing beads or the rubber seal, or – if these are not available – seal the edge area of the sun protection film and the window frame with the help of special silicone.
Can I install sun protection films alone?
We always recommend at least two people to install the film. In principle, assembly can also be done alone, but especially with more complicated steps, such as removing the protective film of the sun protection smart film tint for car and spraying the adhesive surface at the same time, a third or fourth hand makes the work much easier.
Which tool do I need?
Tools and installation utensils that you need to install your sun protection film are:
- 2 pump sprayers (one for the glass cleaner, one for the assembly concentrate)
- 1x assembly concentrate
- 1x glass cleaner
- Glass scraper
- If necessary, replacement blades
- Window wiper
- Puller
- Cutter (to cut the foil if necessary)
- If necessary, replacement blades
- Squeezer
- Squeegee
- If necessary, edge sharpened
After spraying the pane liberally with the glass cleaner, you should put a smart film tint for car on the pane, which will remain attached by the glass cleaner. The adhesive is softened by the plastic foil.
Approx. 30 minutes later you can remove the window film or sun protection film in one piece.
What do I do with glue residue?
To remove the released adhesive, first spray undiluted glass cleaner onto the glass surface. This softens the glue after about 15 minutes. Now you can use a glass scraper to remove the adhesive from the pane.
Caution is required with glass (toughened safety glass)! Since this type of glass has a soft surface, it is very easy to scratch when using glass scrapers.
If the glue does not come off smoothly from smart film tint for car, we recommend rubbing a little spirit on the glass surfaces. After a few minutes, the adhesive residue will turn gray. Now you can easily remove the remains with the help of a glass scraper or a spirit cloth.
Can a window film be removed without leaving any residue?
YES! The films can be removed from the pane without leaving any residue, provided you have the right tool and follow the instructions for removal.
However, it should be noted that very old or cheap foils behave differently when dismantled. It can happen that the film tears into individual pieces – this makes dismantling extremely difficult.
Which tool do I need for this?
In principle, you do not need any special tools to dismantle foils.
You only need a glass cleaner and a glass scraper to remove the smart film tint for car. You can use a little spirit for stubborn glue residue.
We recommend that you use glass cleaner, as it does what it promises. It cleans the window surface perfectly and is also ideal for film installation.
We would like to advise you to avoid using aggressive solvents. These only emit fumes that can harm your health.